

How Do I Register My Echo Device From A Yard Sale
How to Ready Your Repeat Dot

The echo dot set up is very simple ...
In this piece hither we will show y'all the repeat dot setup, and have full reward of all the amazing things you can do.
Perhaps you lot've seen smart technology move from the movies into the homes of your friends and neighbors and you'd really like in on the activity.
While we can't hope to come with an exhaustive A to Z roofing all brands and permutations, what nosotros can do is guide you through setting upwards the enduring Amazon Echo Dot and so you tin make full utilize of phonation activation through Alexa along with several other dwelling automation solutions to make your life easier.
Echo Dot Setup
One of the key attractions of Alexa Echo.
Dot is the fact it's half the size and just one-half the price of the flagship Echo device.

While speaker performance is underwhelming, you'll get the most out of Alexa Echo Dot by communicating with other devices in your smart dwelling using Alexa. It's through the classic voice assistant that Repeat Dot lets you accept advantage of Alexa's 30,000 skills to make your life much less complicated.
Now into its second generation and continuing to sell out the globe over, setting upwardly Repeat Dot is a relative breeze.
Let's Get Started!
The outset thing you demand to do earlier getting downwards to action is connect to your home WiFi network and register your Echo Dot to your Amazon business relationship using the intuitive Alexa app.
Step 1: Download Alexa App & Sign In
The Alexa app is free. You'll be able to use the app to set your device and and so manage your alarms, lists and music forth with much, much more.
Make sure your phone or tablet meets the following specs:
Burn Os ii.0 or higher
Android 4.0 or higher
iOS 7.0 or college
Download the app by searching or click one of the icons beneath to go to the Apple App Shop, Amazon App store or Google Play.
Pace 3: Sentinel This Video!
Elementary Setup to Get You Started!
Watch this curt video on how to gear up up your Echo dot in as fast as 24 seconds! Perfect walk through to watch right before yous dive into your Wi-Fi setup.
Stride iv: Connect Your Echo Dot to Wi-Fi
You lot'll get precise instructions in-app walking y'all through
connecting Echo Dot to your home WiFi.
Tip 1: Sometimes, the set-upward procedure doesn't kick in immediately. If this happens, press and hold the deportment button for 5m seconds. You can then go to Settings > Prepare up a new device and get started manually.
Tip 2: If you face any problems with Repeat Dot connecting to your WiFi, you lot can perform a hard restart by simply unplugging your Echo Dot then plugging it dorsum in. You lot can choose to restore factory.
Want to Review? Go Back a Few Steps ...
Step 5:
Yous're Up & Running And so Talk to Alexa!
Outlining the enormous extent of what Alexa tin can practise to assist you is exterior the scope of today's guide to setting upwards smart home devices.
It's now downwardly to you to explore the many ways in which this versatile voice assistant can streamline your routines.
Change the default wake word if Alexa is not to your liking. Only go to Settings > Select my Repeat device > Wake word and customize it to taste.
You take now completed the Echo dot setup, what'south next? When making the investment to purchase a cool device such as the Alexa repeat dot, it's important to take full reward. We are going to testify you how to take reward of your repeat dot.
Alexa, Let In that location exist Light
Sure you detect on the bundle of the Alexa Echo dot information technology say "Alexa, let at that place exist light." Have full advantage of the Alexa devices by interconnecting your home and appliances. Whether it's a door lock, lights, motions sensors, and more than y'all can control them all through Alexa.
Maybe yous want to take plug-in modules exterior and take control of lights and appliances in the garden from your smartphone.
Y'all might be surprised at but how like shooting fish in a barrel it is to get started.
Step 1:
Gear up Your Plug-In Module
Purchase the plug-module
We'll stick with a sinning team and give another Insteon product an outing with this outstanding plug-in module allowing y'all to remote control lights from anywhere, or just give Alexa command.
Getting Started couldn't be much easier.
Insteon Remote Control Outdoor Plug-In Module:

Plug In.
Plug your appliance into the bottom of the plug-in module. Plug the module itself into a weatherproofed outlet.

Bank check the Apparatus.
Your appliance needs to exist on if you want assume remote command so brand sure that's the case

Connect to Insteon Hub
If you're invested into Insteon super-dependable dual-mesh network already, you'll have a hub. If non, get i and you can start really expanding your smart dwelling through one intelligent gateway.
You'll go elementary on-screen instructions and you'll be connected in minutes.
Step 2: Sit Dorsum & Take Charge
Control your garden appliances from afar in-app on your smart telephone and start getting even more out of your smart habitation.
How almost if your've got a smart dwelling house base of operations largely on Z-Wave technology?
the GE plug-in module is another smart dwelling gadget with a low barrier to entry and uber-piece of cake installation.

GE Z-Wave Plus Plug-In Smart Lamp Dimmer Module with USB Ports

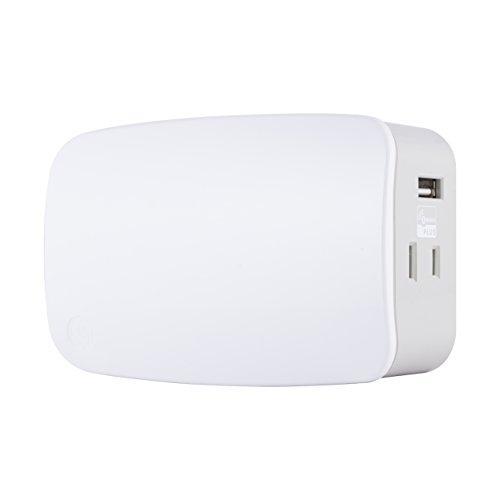
$69.99
Ii for the price of 1
Both Z-Wave-enabled outlets are independently controlled then you'll be able to plow off connected devices individually and remotely.
Plug in
Put the lite you want control of into ane of the Z-Wave outlets on the plug-in module.
Plug the dimmer itself into whatsoever grounded outlet, ideally the top outlet of a pair
Manual/Program push button
You lot can turn any connected light on or off using this push.
You can also adjust brightness levels by holding down the button.
This button as well allows you to add and remove the plug-in module from the network.
Add device to your Z-Wave network
Follow the basic instructions on your Z-Wave controller.
Add together your smart dimmer to the network then press and release the Manual/Plan button. Pretty easy correct?

Light Switch
You're spoiled for selection if you want to automate the lighting in your home with everything from dimmer switches to on/off switches helping you relieve energy while also making your life more convenient.
To stick with the classic theme kickstarter with Echo Dot, we'll break down only how easy it is to ready a pair of Insteon classics in this vertical, the remote command dimmer and the remote control on/off switch.
Fix Your Dimmer Switch
Click the push to get your remote command dimmer switch!

Get some simple equipment together.
- Flathead screwdriver
- Philips screwdriver
- Wire cutters
- Coltage detector
Cut the power.
It's essential that you disconnect the power before installing your Insteon devices. This might seem like a statement of the obvious, but take information technology slow and steady starting past turning off the ability to the switch at the?
Remove your sometime switch.
Take the old switch out and disconnect the wires.
You'll see at this stage if your box has the required neutral wires. If non, you'll need to seek farther assistance or investigate a smart switch that doesn't call for a neutral wire.
Time for testing
Plough the power on at the excursion billow.
Use your voltage detector to decide line load wire. You'll see that line is energized.
Click Here for Info On Wiring Your Devices.

It's time to plow the power off at the circuit billow.
Connect the wires from your dimmer switch to the corresponding wires in the junction box.
Check that there's no copper wire exposed and that all wire nuts are tightened.
Mounting.
When yous mountain the switch into the junction box, make certain the LED bar sits to the left side so you lot can power on the switch at the circuit billow panel.
Testing again.
Tap the paddle then printing and hold the bottom of the paddle to ensure the light dims.

Link up to your Insteon hub.
Y'all just need to follow some simple on-screen instructions inside the Insteon for Hub application and you can link your dimmer switch to your hub.
You'll be prompted to press and agree the Set push and then you can take in-app.
From hither yous're set to set up your on off switch for piece of cake dimming action.
Fix Your On/Off Switch

If you prefer the thought of a full-blooded on/off switch instead, check out how straightforward it is to go upward and with this Insteon remote control smart switch.
Get together your equipment
- Flathead screwdriver
- Philips screwdriver
- Wire cutters
- Voltage detector
Consider whether to call in an electrician.
While a lot of people do it themselves, there are some that don't feel as confident, which is okay. Unless you're very familiar with electric circuitry, you might want to retrieve seriously in an electrician.
You can employ software such equally the Insteon for Huib application to make things simple or contact the responsive Insteon support line if you meet any problems.
If you are upwards to proceeding safely and confidently, it's time to hit the power...
Cut the ability.
Disable the power excursion at the fuse panel or excursion breaker.
Get prepared.
Take the faceplate off your existing switch. Unscrew the switch and accept information technology out of the junction box.
Wiring
Disconnect the wiring leaving a 1/ii-inch exposed at the ends. Connect Line (black), Load (red), Neutral (white) and Ground (copper/green) wires to your Insteon device.
Note: Although mechanical switches don't utilize neutral wires, they're available at the back of the switch box.

Attach everything.
Make sure all the wires are tightly fastened.
The ground wire should exist the just exposed copper.
Have command.
Yous can utilize ToggleLinc switch to turn the calorie-free on and off, as an Insteon controller or an Insteon responder.

Motion Sensors
Many people simply starting to automate their homes encompass move sensors to trigger other continued devices based on the action that causes the trigger.
Once more, it'south a common misconception that setting up movement sensors is complicated. it isn't.
We'll show you lot how to get up and away with a cracking Z-Wave move sensor to further automate your smart domicile the piece of cake way.

Add your motion sensor to the Z-Moving ridge network.
Wall mounting your motion sensor.
Whatsoever wall with a line of sight on the area you lot desire to monitor is suitable for mounting your motion sensor.
Position the sensor equally high as possible to minimize the chance of whatever obstructions.
Clean the wall thoroughly so device weather you want to use tape or screws.
Using double-sided tape to wall mount your motion sensor.
Stick your magnetioc crdle to the wall using the double-sided tape included.
Put the sensor body on the cradle and so it'southward suitably angled to monitor your room.
Using screws to wall mount you motility sensor
Carve up the magnet from the wall mount.
Property the wall mountain against the a wall, drive the screws through the holes and reattached the magnet to the wall mount.
Using the motion sensor on a table
You can sidestep mounting altogether, and only place your motion sensor on a shelf or table.
Shop Alexa Controlled Lights
Shop Alexa Echo Dot
Looking to setup a thermostat?
Click the button below!
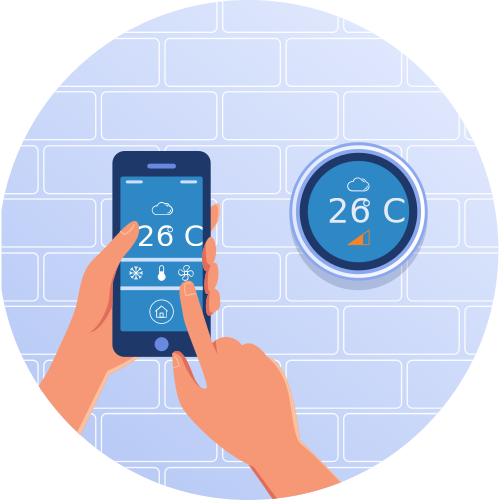
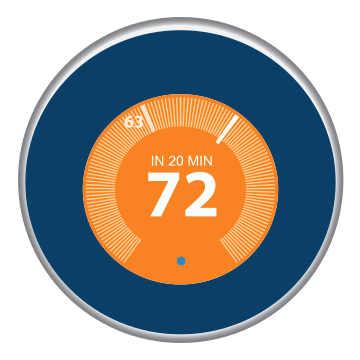
Thermostats
Smart thermostats can help you continue your home more efficently heated so yous can feel comfier while saving money on your utility bill each month.

If you've got a smart home based on the Z-Wave network, this superb thermostat is non straightforward to install and yous'll need to call in an electrician unless you're qualified yourself.
Install the wall plate.
Separate the thermostat from the wall plate by grasping and pulling autonomously.
Mountain the plate to the wall using the screws supplied.
Power.
You connect the common side of your transformer to the C terminal.
You lot need to remove the plastic tab in the battery holder. This is popped in to prevent the bombardment discharging during shipping.
Wiring.
Remove the jump or motion the jumper.
Push all backlog wire into the wall opening. Use not-flammable insulation to plug the gap.
Mount thermostat and become going
With everything in place, you tin can set the time and appointment and run through installation using the simple but constructive impact screen.
Z-Wave enrollment.
Once y'all're up and running with your thermostat, yous'll need to enroll on the Z-Wave network.
This is super-simple.
- Set the controller to Include mode
- Select 1 to add thermostat to piece of work
- The device is now added and you can share node data with other Z-Wave-enabled devices
Final Words

Setting up devices and appliances in a smart home needn't exist overwhelming or off-putting
While we're here to cater to the real smart home enthusiasts, information technology's too part of our task to encourage anyone thinking nigh upgrading the intelligence of their dwelling house simply not quite gear up to take the plunge.
Nosotros could have gone on all day listing out how-to guides for every appliance on the marketplace but who's got fourth dimension for that?
Nosotros've tired to illustrate today that any your ambitions for your smart home may be, you really don't need to spend much fourth dimension by the way of installation and you can generally set things upwardly yourself.
Whether yous want to get up and running apace with your new Echo Dor or undertake the more than install of a thermostat, all you need to exercise is follow some simple instructions and you'll be good to go. If you prefer visual props, information technology'southward very piece of cake to observe YouTube videos and other resource to guide you lot through any tricky spots in gear up-up process.
Click the arrow to go back to the beginning or select from the menu below.
Subscribe to our newsletter
Subscribe now to get the latest & greatest news on smart dwelling products & receive special offers only for our newsletter subscribers.

How Do I Register My Echo Device From A Yard Sale,
Source: https://www.smarthome.com/pages/echo-dot-setup
Posted by: steinerhationger.blogspot.com
0 Response to "How Do I Register My Echo Device From A Yard Sale"
Post a Comment